Can you polish concrete? How do you polish concrete?
Andy Harrison2023-08-23T16:49:35+01:00With uncertain times ahead, diversification is worth looking into. One area growing in popularity is polishing concrete to a glassy smooth finish, resembling granite or marble.
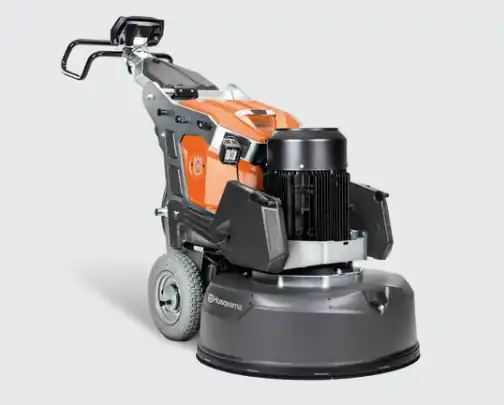
With a little investment and knowhow, you can add another profitable string to your bow. All you need is a variable speed floor grinder which you can hire, a dust control unit and a set of polishing diamonds and pads.
Polishing concrete is a multi-step process that involves grinding, honing, and polishing the surface to achieve a smooth and shiny finish. Here's a general guide on how to polish concrete:
Materials and Tools You'll Need:
- Concrete grinder or polisher. Tip – the bigger the floor grinder, the better the outcome.
- Dust control unit that connects to the floor grinder.
- Grinding/polishing pads of varying grits and stages.
- Safety gear (goggles, dust mask, ear protection, gloves)
- Concrete densifier
- Concrete sealer (optional)
- Grout (optional)
- Burnishing machine (optional)
The stages
- 25g metal shoes (May not be needed if the floor is perfectly flat)
- 80g metal shoes
- Grout (If using, to fill cracks and holes)
- 150g metal shoes
- Densify
- 150g plastic shoes
- 200g plastic shoes
- 400g plastic shoes (This stage leaves you a nice-looking floor with a shine)
- 800g plastic shoes (This stage gives you more of a shine)
- 1500g plastic shoes (This stage gives you more of a shine)
- 3000g plastic shoes (This stage gives you more of a shine)
- Seal the floor after the last stage
Steps to Polish Concrete:
Preparation:
- Clear the area of any debris, foreign objects or obstacles.
Grinding:
- Begin with a coarse grinding pad (25 or 30 grit) on the concrete grinder. This will remove any existing coatings, blemishes, or rough spots.
- Pass the grinder over the surface in a systematic manner, overlapping each pass slightly for even coverage. For best results alternate passes vertically and then horizontally across the floor.
- Use a vacuum to remove the dust generated during grinding before moving between shoes.
- Move onto grinding with 80 grit diamond shoes to further smooth out the surface.
Honing:
- Progress to finer grit pads (100, 200) to further smooth the surface.
- Each grit level will gradually refine the surface and remove the scratches left by the previous grit.
Polishing:
- Continue using even finer grit pads (400, 800, 1500, 3000 grit) to achieve a glossy finish. The aggregates should be exposed and as you progress, the concrete should start to develop a polished sheen.
Densification (Optional):
- Apply a concrete densifier to help strengthen and harden the surface. Follow the manufacturer's instructions for application.
- Densifiers can also enhance the sheen and longevity of the polished finish.
Final Cleaning:
- Thoroughly clean the surface to remove any residue, dust, or slurry generated during the polishing process.
Sealing (Optional):
- If desired, apply a concrete sealer to protect the polished surface from stains, moisture, and wear.
- Sealing can enhance the appearance and durability of the polished concrete.
Burnishing (Optional):
- For an even higher level of gloss, you can use a burnishing machine with a polishing pad to achieve a reflective shine.
Remember that the process of polishing concrete can vary depending on factors such as the type of concrete, its condition and the equipment you're using. It's recommended to follow the manufacturer's instructions for any equipment or products you use and consider practicing on a small, inconspicuous area before working on a larger surface. Additionally, proper safety precautions are essential when working with concrete grinders and other machinery.
Multi-Hire would be more than willing to advise on hiring equipment and buying the requisite floor grinding diamonds, polishing pads and application products.